


The Project Scion tC has moved through many stages of development – power, entertainment and style to name just a few. It’s now time to address an area that is truly functional and can make or (literally) break the success of any performance build – braking. We are honored to be the first to install the new TRD big brake kit for the tC, and thanks to the crew at International Automotive and Custom in Woodbridge, Ontario, the install was painless.
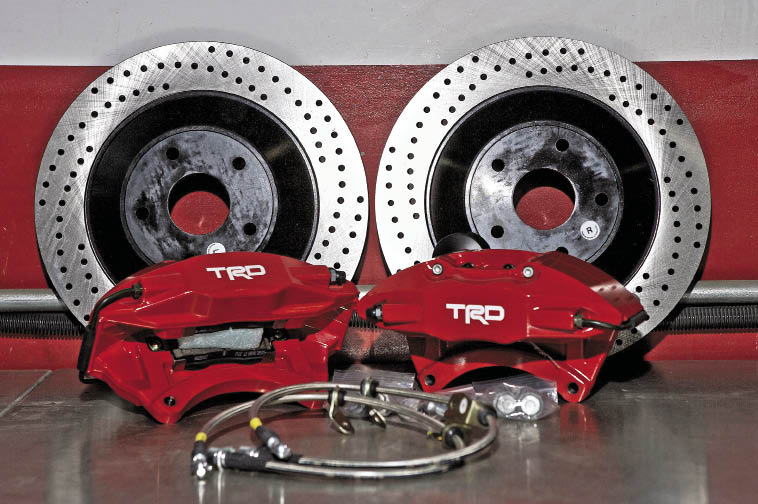
The TRD PTR09-21111 kit features a set of monoblock 4-piston calipers, upgraded brake pads, new brake lines, a pair of cross-drilled, vented rotors and mounting hardware. The size of the rotors and caliper pistons has been carefully chosen to maintain proper front/rear braking bias and ABS functionality. This kit is designed to work with with the tC’s OEM 18-inch wheels in addition to the aftermarket variety that are at least 18 inches in size.
 |
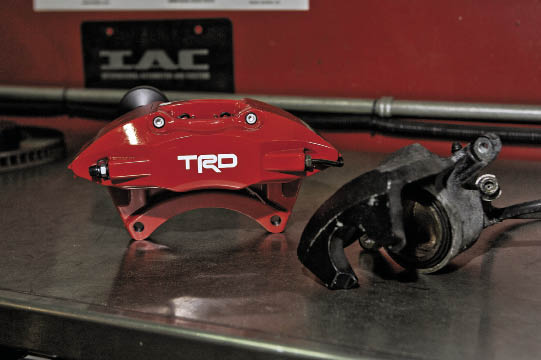 |
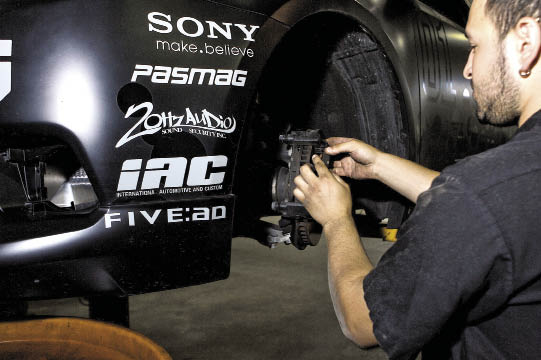
Step 1: Remove OEM brakes
As with most OE-developed products, a very detailed 13-page installation manual is included.
• Raise the car on a chassis hoist and remove the wheels and store in a safe place away from the vehicle.
• Disconnect and cap the factory rubber brake line from the hard line.
• Remove the OE brake caliper and hose, bracket and rotor. Discard or sell on eBay.
 |
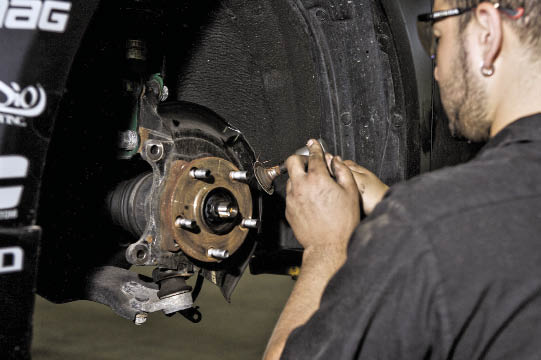 |
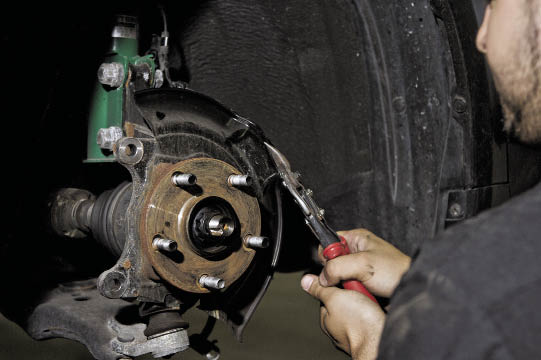
Step 2: Modify factory dust shield
• Clean the dust shield and mark the areas to be removed with a paint marker as per pages five and six of the instructions.
• Using tin snips (and wearing gloves) cut away the metal. Use an angle grinder to clean up the edge if required.
• Spray or paint the exposed metal edge with Tremclad or a similar product to prevent rust.
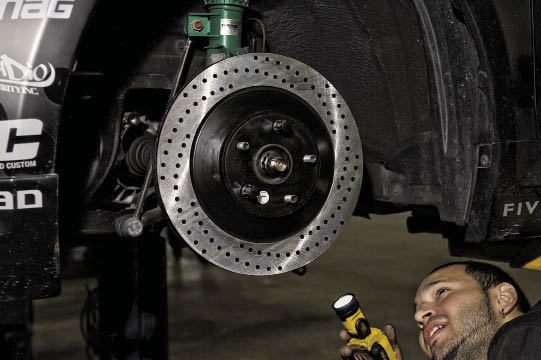
Step 3: Install the TRD rotor
• Clean the surface of the hub with a wire brush to ensure the rotor will sit flat.
• Clean the shipping anti-rust coating off the front and back of the rotor with brake cleaner.
• Slide the rotor onto the hub and tighten with a single lug-nut by hand to hold it in place.
• Check for proper clearance between the rotor and the dust shield. Trim the dust shield if necessary.
Related Articles
 Chevy Camaro to return in 2028?
 Canon Becomes Formula DRIFT’s Official Imaging Partner for 2026 Season
 Meguiar’s and TJ Hunt Set to Unveil Ferrari 488 GT3 EVO Livery at Formula DRIFT Long Beach
Hyundai unveils body-on-frame Boulder SUV Concept
Meguiar’s and TJ Hunt Set to Unveil Ferrari 488 GT3 EVO Livery at Formula DRIFT Long Beach
Hyundai unveils body-on-frame Boulder SUV Concept
 King of the Hammers 2026: It’s Not the Machines. It’s the Culture
Corvette Grand Sport returns for 2027 with new 6.7L V8
King of the Hammers 2026: It’s Not the Machines. It’s the Culture
Corvette Grand Sport returns for 2027 with new 6.7L V8